


Last updated January 2026
July 2023
Experience shows that good flat stable baseboards are a prime necessity when building in P4. We built the baseboards for Pulborough to the best of our ability, but after about 20 years they started to sag and required some remedial work (not entirely successful). The baseboards for Plumpton were built using some of the lessons learned from Pulborough, but even here some minor corrective work was required when one board started to sag allowing free-running wagons to roll away a few inches rather than staying put.
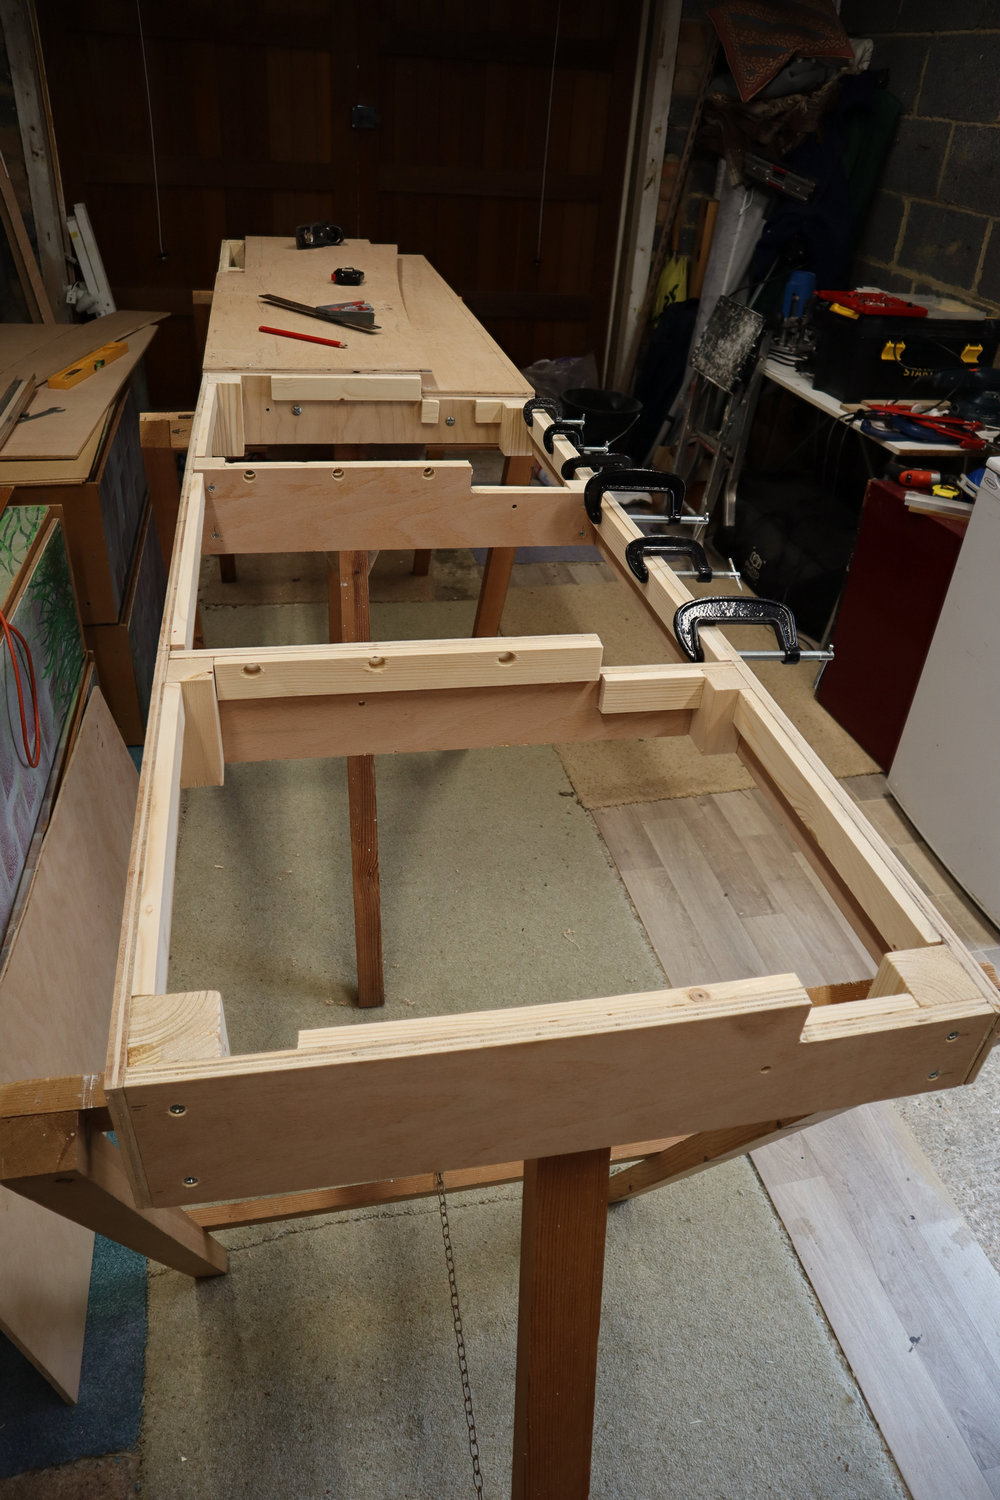
The baseboards for Ouse Wharf are being built with even more care to avoid future problems! They are relatively small, being 1200 by only 500 mm wide. They are built using 9mm ply for sides and top. The board ends between the two boards are 12mm ply to accommodate the locating dowels (EM Society recycled from Brighton Road) and the front is also 12mm ply because it is only 70 mm deep. The corners are reinforced with 44x44 mm softwood blocks. Because the boards are relatively narrow we’re not too concerned about them twisting, but we have provided intermediate cross pieces to provide support to the top.
 The photo left shows the construction, the far board with the tops fixed down, the upper level for the wharf, and the lower level for the river. The near board shows the cross pieces in place. The top edges of these and the sides and ends are reinforced with 24 by 12 mm softwood to provide enough width to secure the screws for the tops. Holes have been drill through the tops of the cross pieces to accommodate wiring.
With the two boards finished, we can start laying track. We have opted for a conventional cork underlay, and have covered the two wharf-level board tops completely. One of the risks of making trackwork on a Templot drawing is the potential for each track section to lose shape when the backing paper is removed prior to laying. As with Plumpton my preference is to lay track and ballast at the same time. This is much quicker than ballasting separately at a later stage (after the track has been glued down) and also seems to me to give a better finished appearance. The alternative approach of laying the ballast dry, and then gluing in place by dripping thinned PVA on top is very tedious, but also ends up with a shiny surface on top of the ballast. However, there are risks associated with this approach, firstly a little too much haste to get the track laid and ballasted before the glue dries, and hence not paying sufficient attention to track alignment. Secondly the risk of getting ballast under the sleepers (especially the ends of the panels) giving rise to vertical misalignment.
To avoid these problems, this is the approach we have taken:
- tape the entire track plan and track in place on the two boards
- cut around the paper template for one panel and lift out. Remove the paper template from the track panel.
- replace the track panel, and check alignment (ie that it has retained its shape) using pins pressed into the baseboard if necessary.
- lift again, and apply PVA to the end sleepers (all end sleepers are riveted and soldered) and replace the panel, checking alignment. Place weights on the track and wait until dry.
- repeat the above steps for the panels either side of the first panel, and continue as desired
- when the first panel is dry and firmly fixed in place, unsolder the end sleepers and lift the track again. Apply an even layer of PVA, replace the track, and resolder the end sleepers, again checking alignment, both horizontally and vertically.
- weight down all the track, and carefully remove the weights one by one, and add the ballast, ensuring the the track cannot lift (and get ballast under the sleepers).
- repeat for each panel.
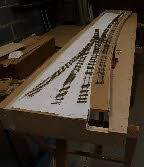 The photo left shows track-laying in progress. The entire track plan was taped to the baseboards, and the track on the right has been laid and ballasted as described above.
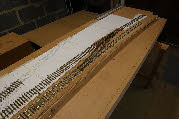
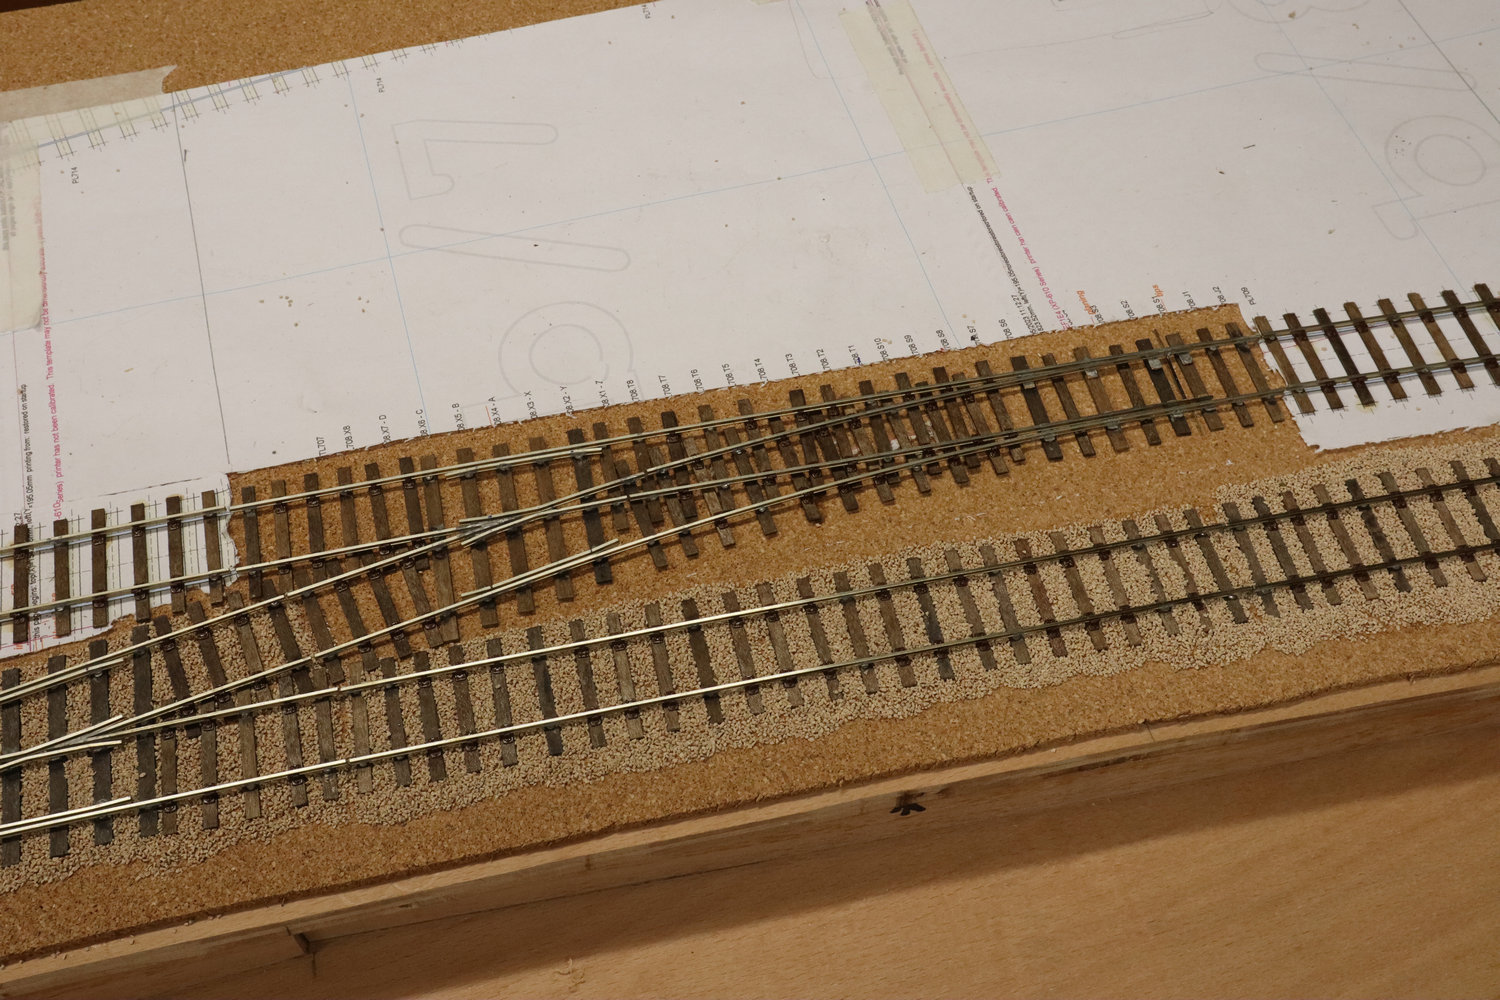
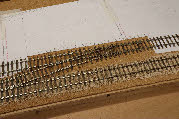 The photos left and right show the next panel to be laid. It has been cut away from the rest of the template, lifted, and the template removed from the underside of the turnout. It will be refitted in place, using the previously laid track panels and the paper template as guides, to ensure correct positioning and alignment. The three end sleepers will be glued down.


 The photo left shows the construction, the far board with the tops fixed down, the upper level for the wharf, and the lower level for the river. The near board shows the cross pieces in place. The top edges of these and the sides and ends are reinforced with 24 by 12 mm softwood to provide enough width to secure the screws for the tops. Holes have been drill through the tops of the cross pieces to accommodate wiring.
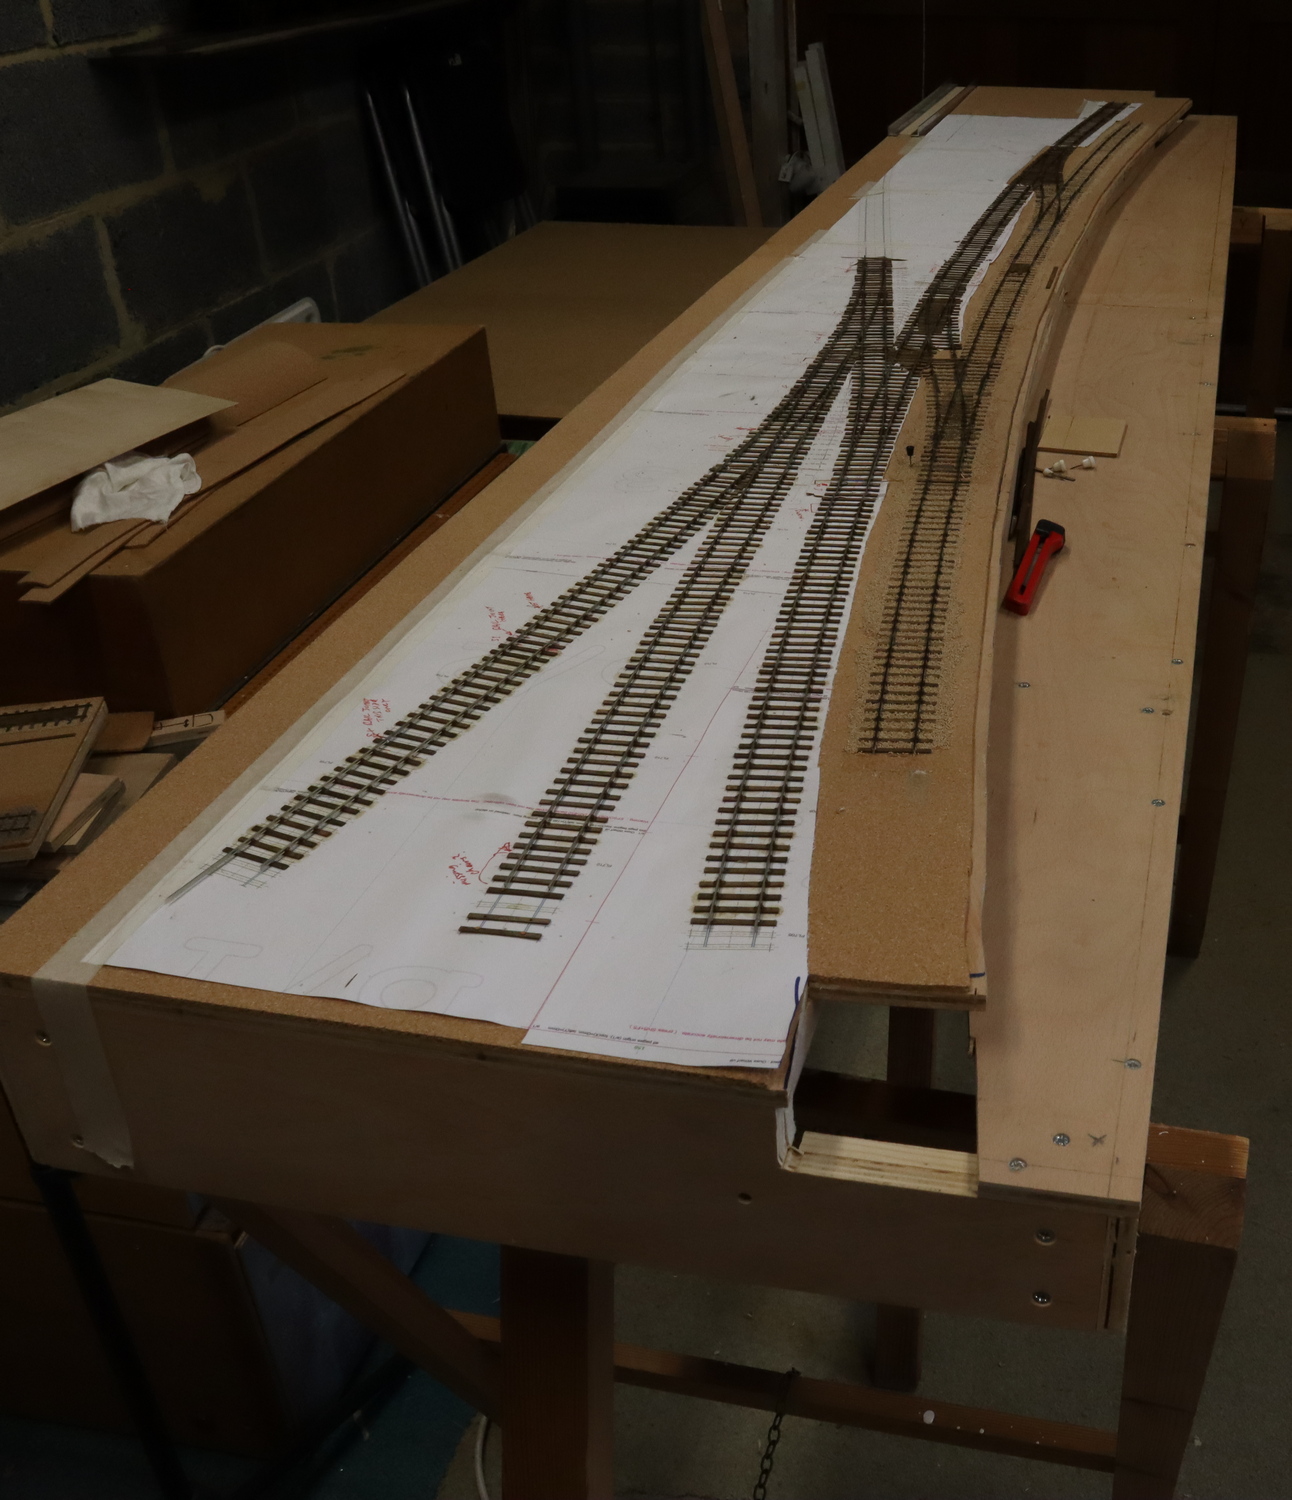 The photo left shows track-
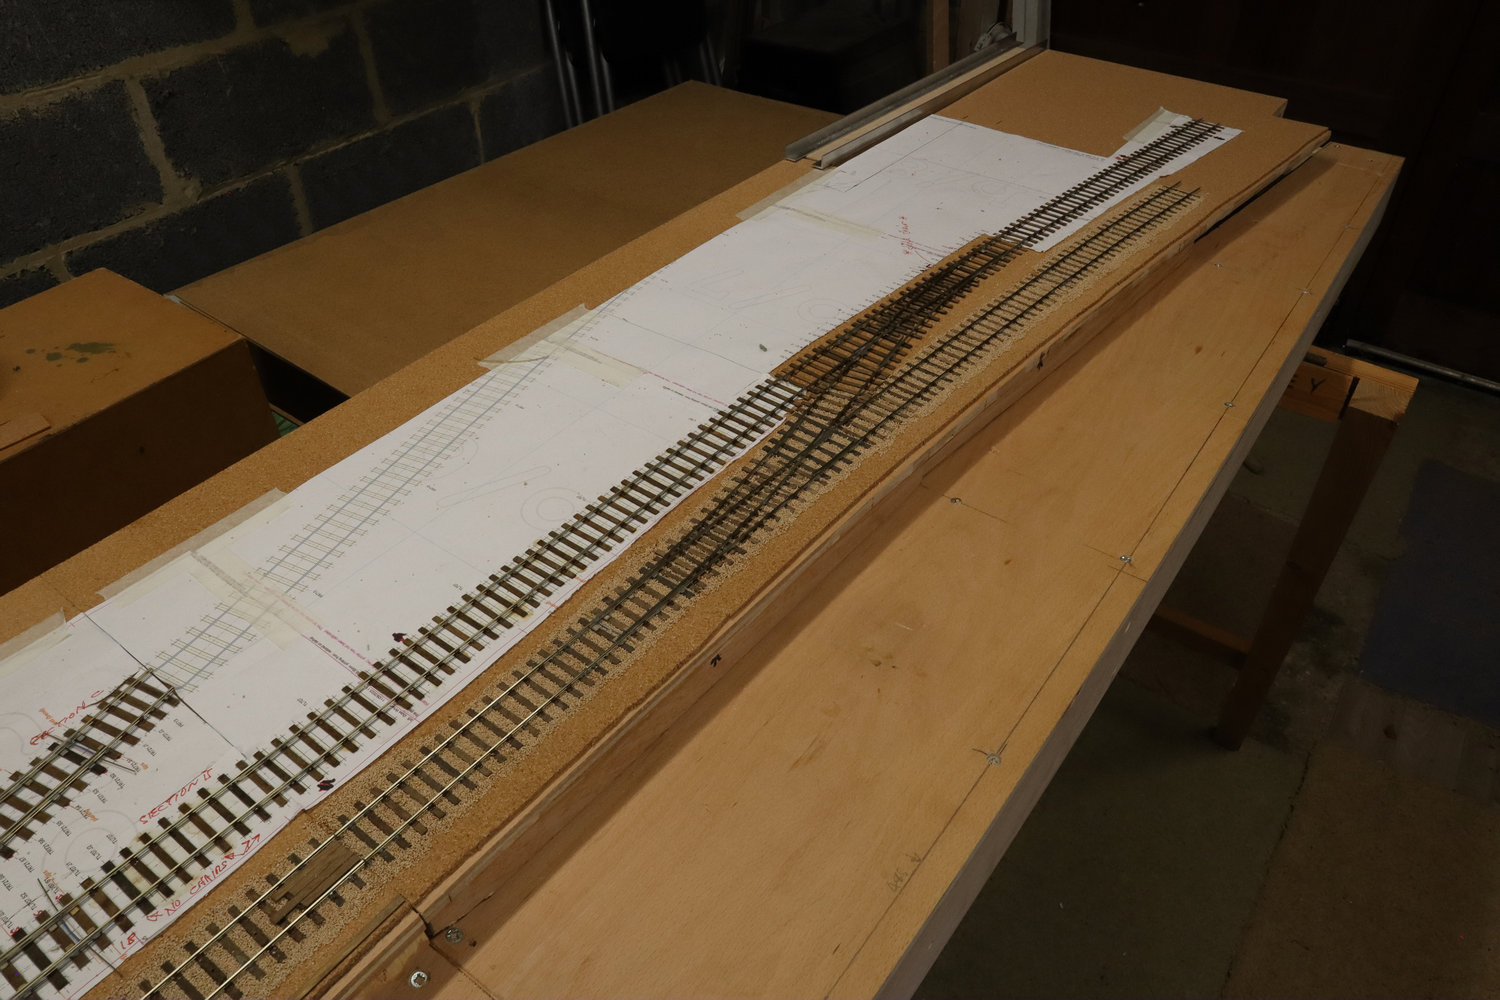
 The photos left and right show the next panel to be laid. It has been cut away from the rest of the template, lifted, and the template removed from the underside of the turnout. It will be refitted in place, using the previously laid track panels and the paper template as guides, to ensure correct positioning and alignment. The three end sleepers will be glued down.